Documentation
User Guide
Everything you need to know to get started with AIgentProp and manage your properties efficiently.
Post First Properties
Showing Setup Options
After setup is complete, go to Properties and click Post Online (top-right). Your listing will be published to platforms like Zillow, Realtor.com, and Apartments.com.
Next step: wait for leads. The AI will take care of lead response and follow-up automatically.
Agent-Guided Showing
Self Showing
Data Visualization
Dashboard Leasing Performance
/dashboardUse Dashboard to monitor portfolio-level leasing performance: lead activity trends, communication volume, funnel progression, and source mix.
This view is designed for team-level decision making and weekly performance reviews.
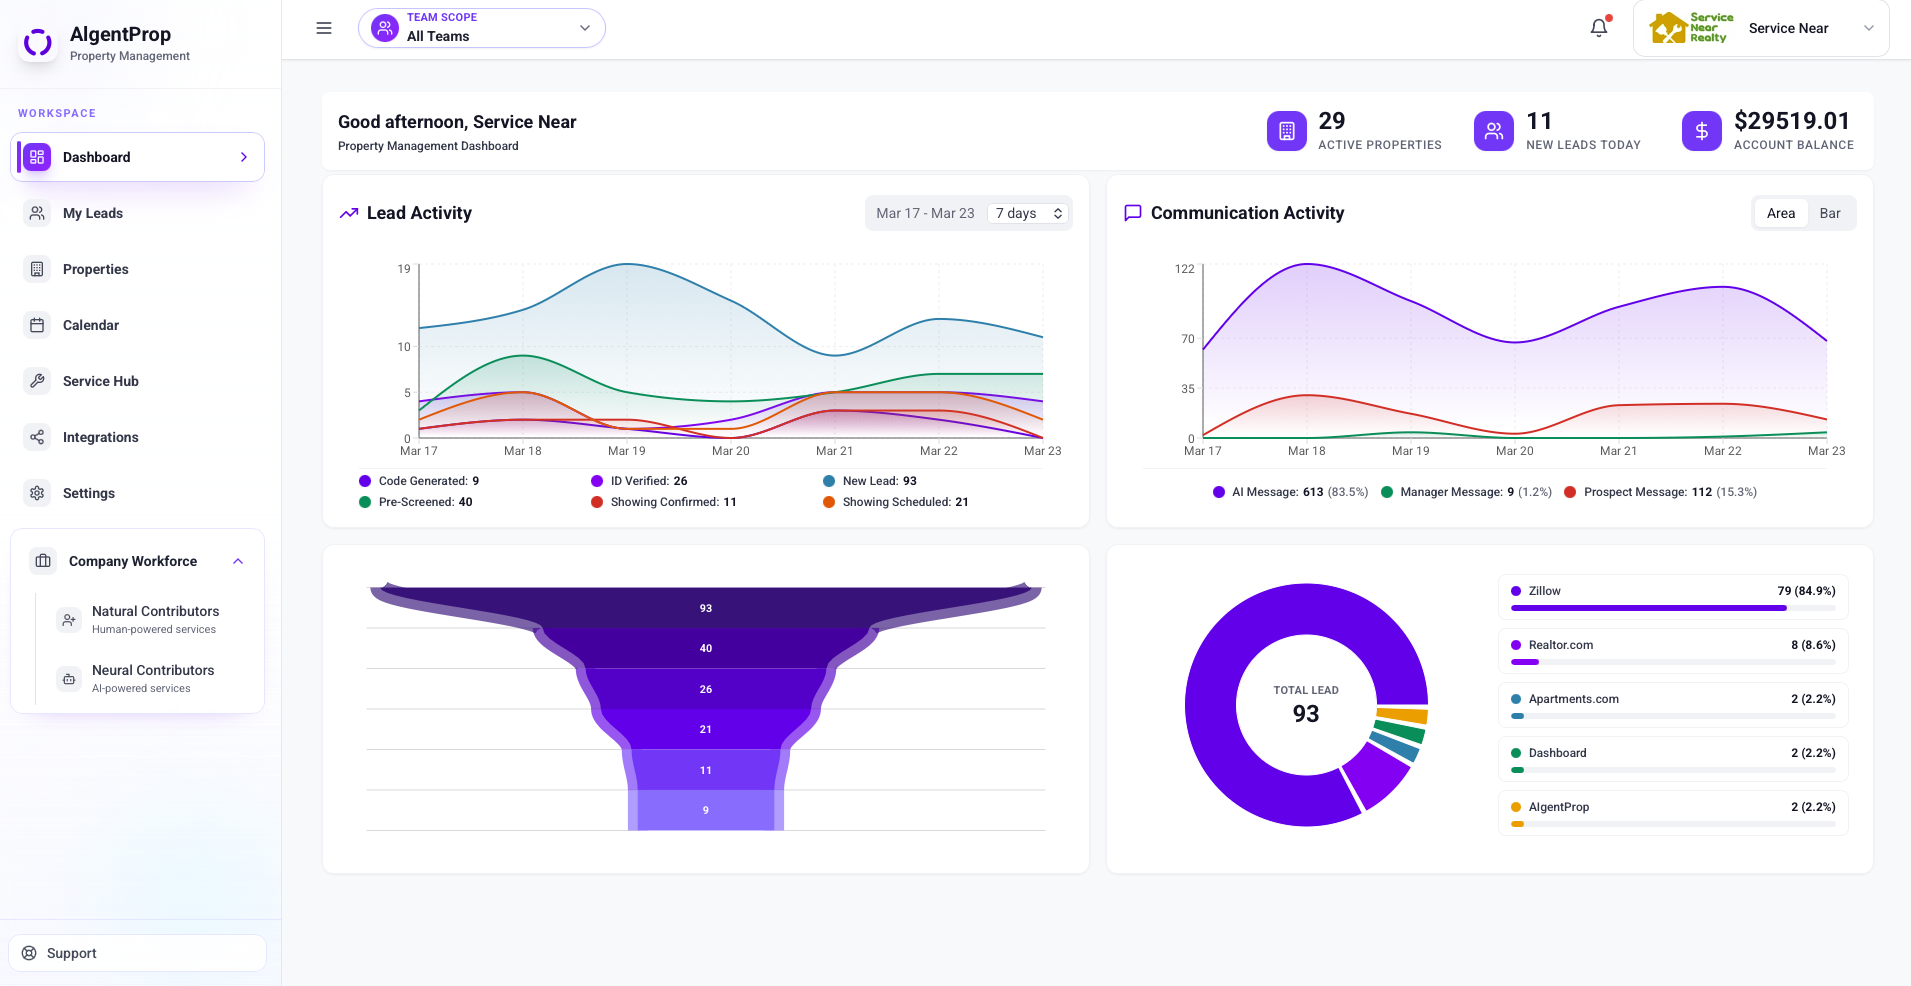
What To Review
Property Analysis
/properties/[propertyId]For property-level performance, open Properties > Statistics to evaluate leasing outcomes per listing.
This tab combines operational leasing signals with market pricing context so you can adjust strategy per property.
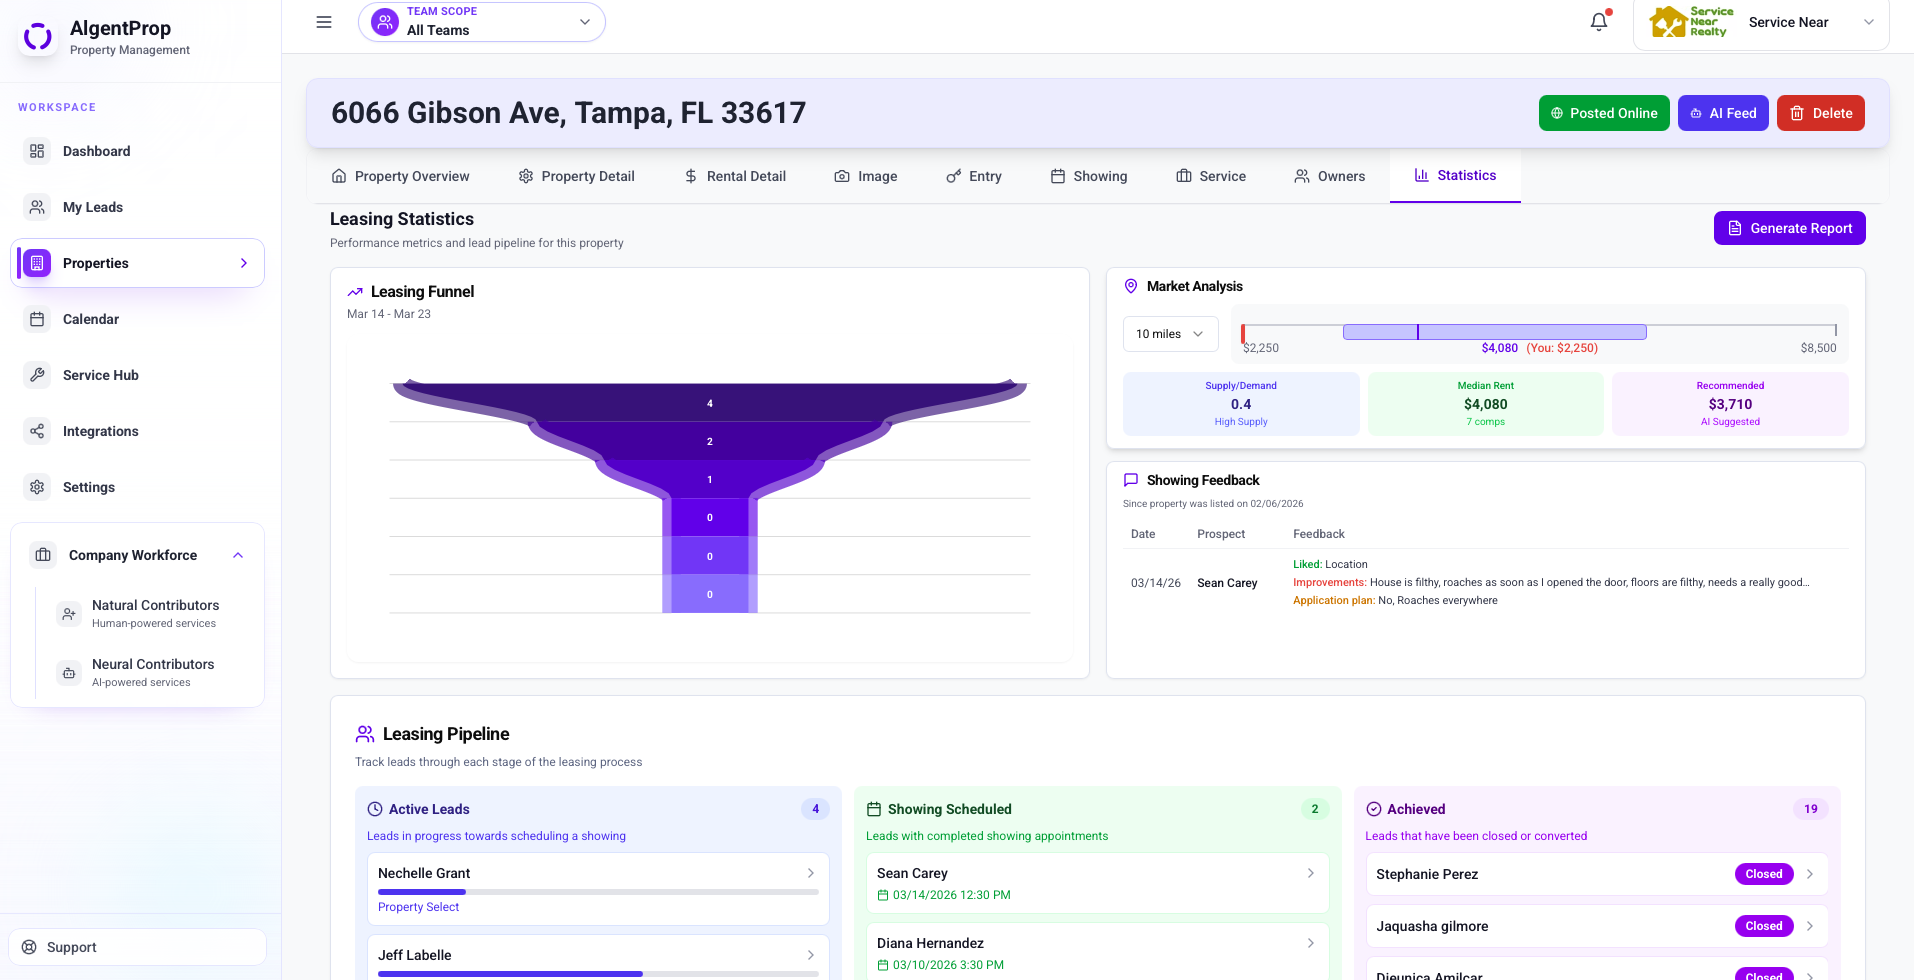
What To Review
Manage Leasing Team and Profile
Manage Leasing Team and Profile
/my-profileOpen Profile to manage company identity and team setup, especially Leasing Team Info.
This section controls who is assigned as leasing manager contacts and how team-level performance can be segmented across the dashboard.
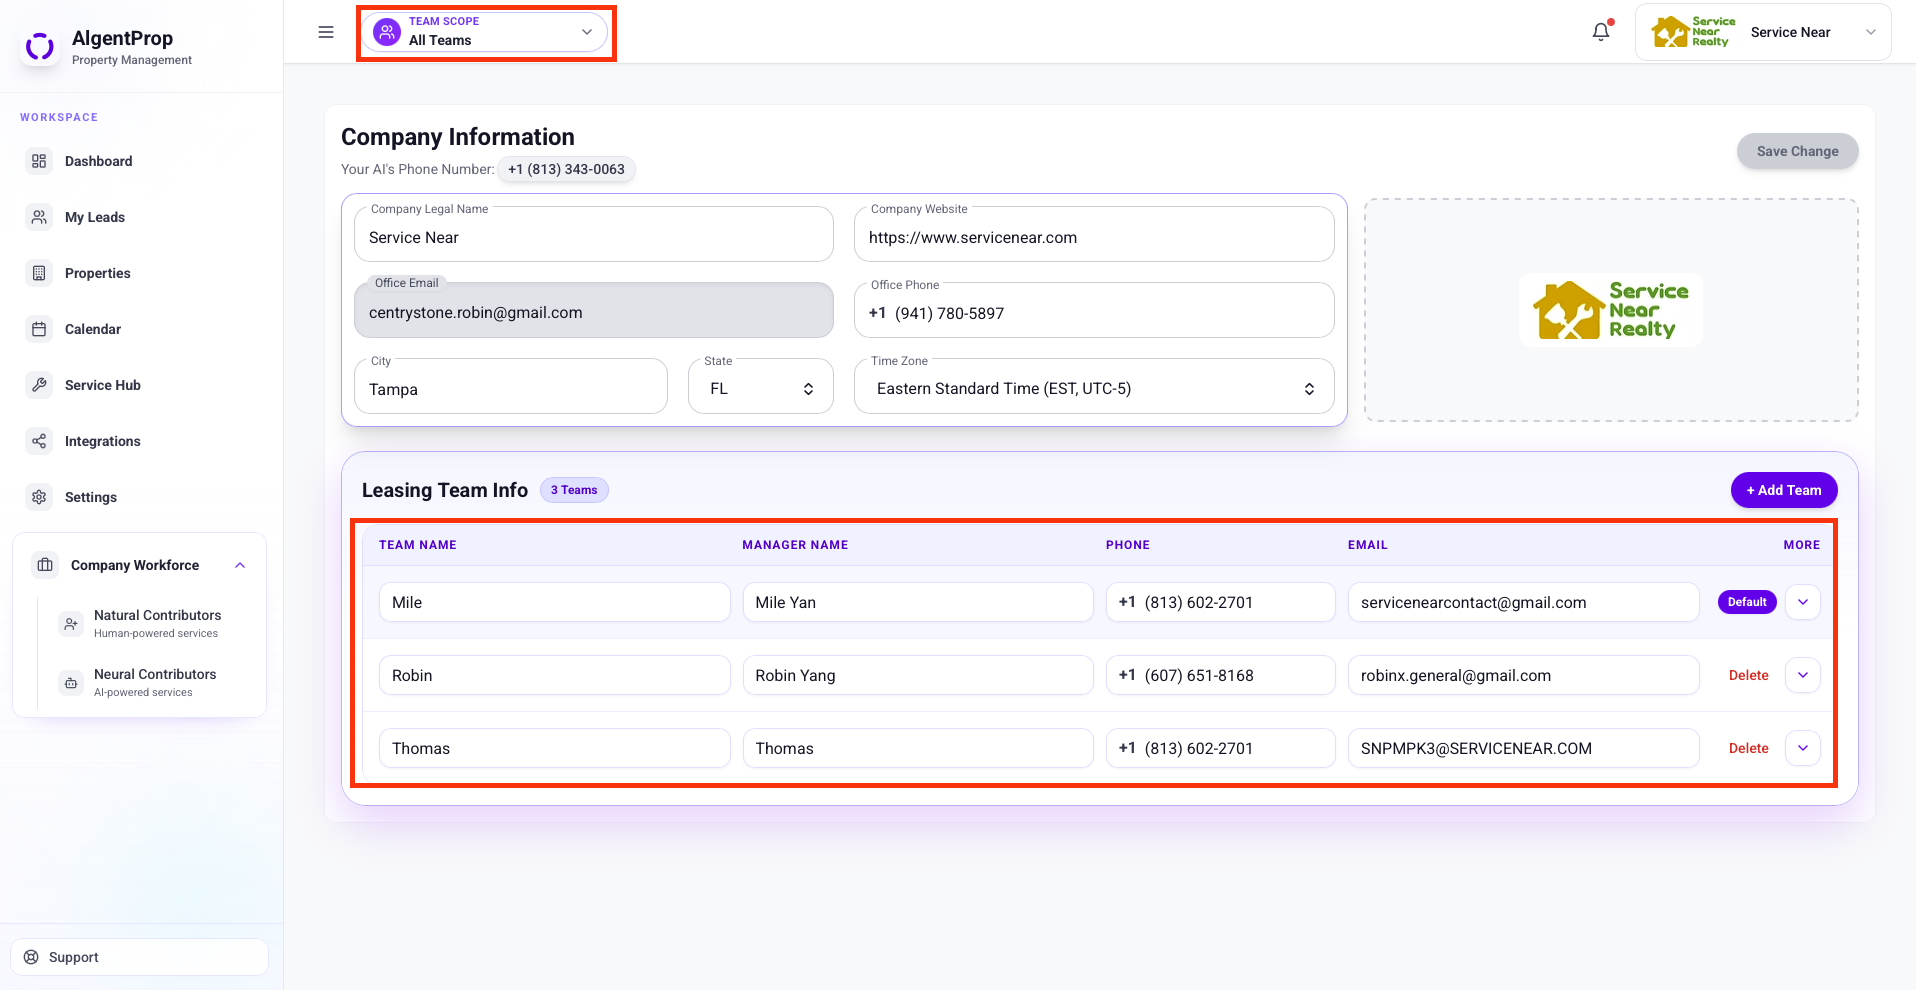
Leasing Team Setup In Profile
How Team Links To Properties
Use Team Scope For Performance Views
Manage Lead
Manage Lead
/my-leadsOpen My Leads to manage incoming leads end-to-end: review conversations, reply manually, control AI behavior, and move workflow stages when needed.
This page is designed for high-frequency operations. Most steps run automatically, but you can intervene manually at any point.
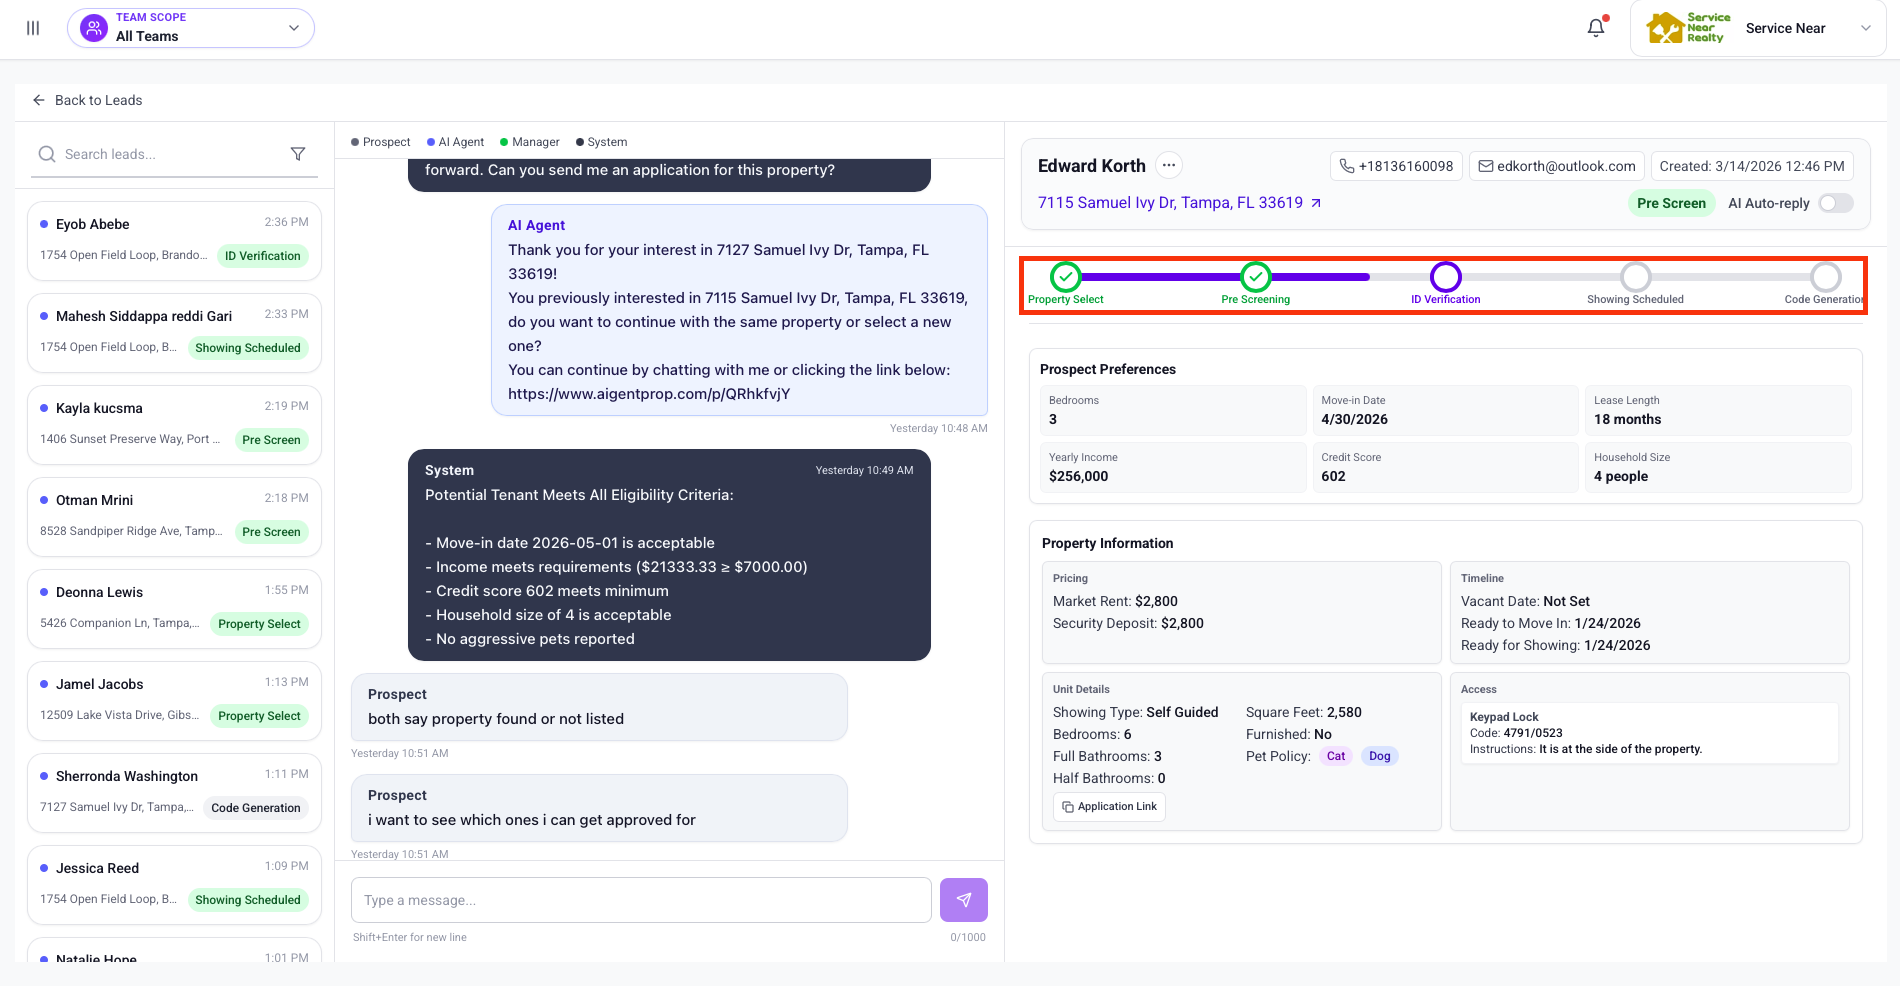
Daily Workflow
Key Modules On The Page
Special Attention
Best Practice
Manage Properties
Manage Properties
/properties/[propertyId]Use Properties to manage each listing from setup to leasing operations. Open a property and use the top tabs for each workflow module.
The structure below maps to the real tab layout in your property page so new users can follow it directly.
Property Tabs And What To Do
Recommended Usage Flow
Manage Showing
Manage Showing
/calendarUse Calendar to view and manage showing events. Click an event to inspect details and update status when needed.
You can also manage showing actions from a lead detail page via the Progress Bar (including modify and cancel).
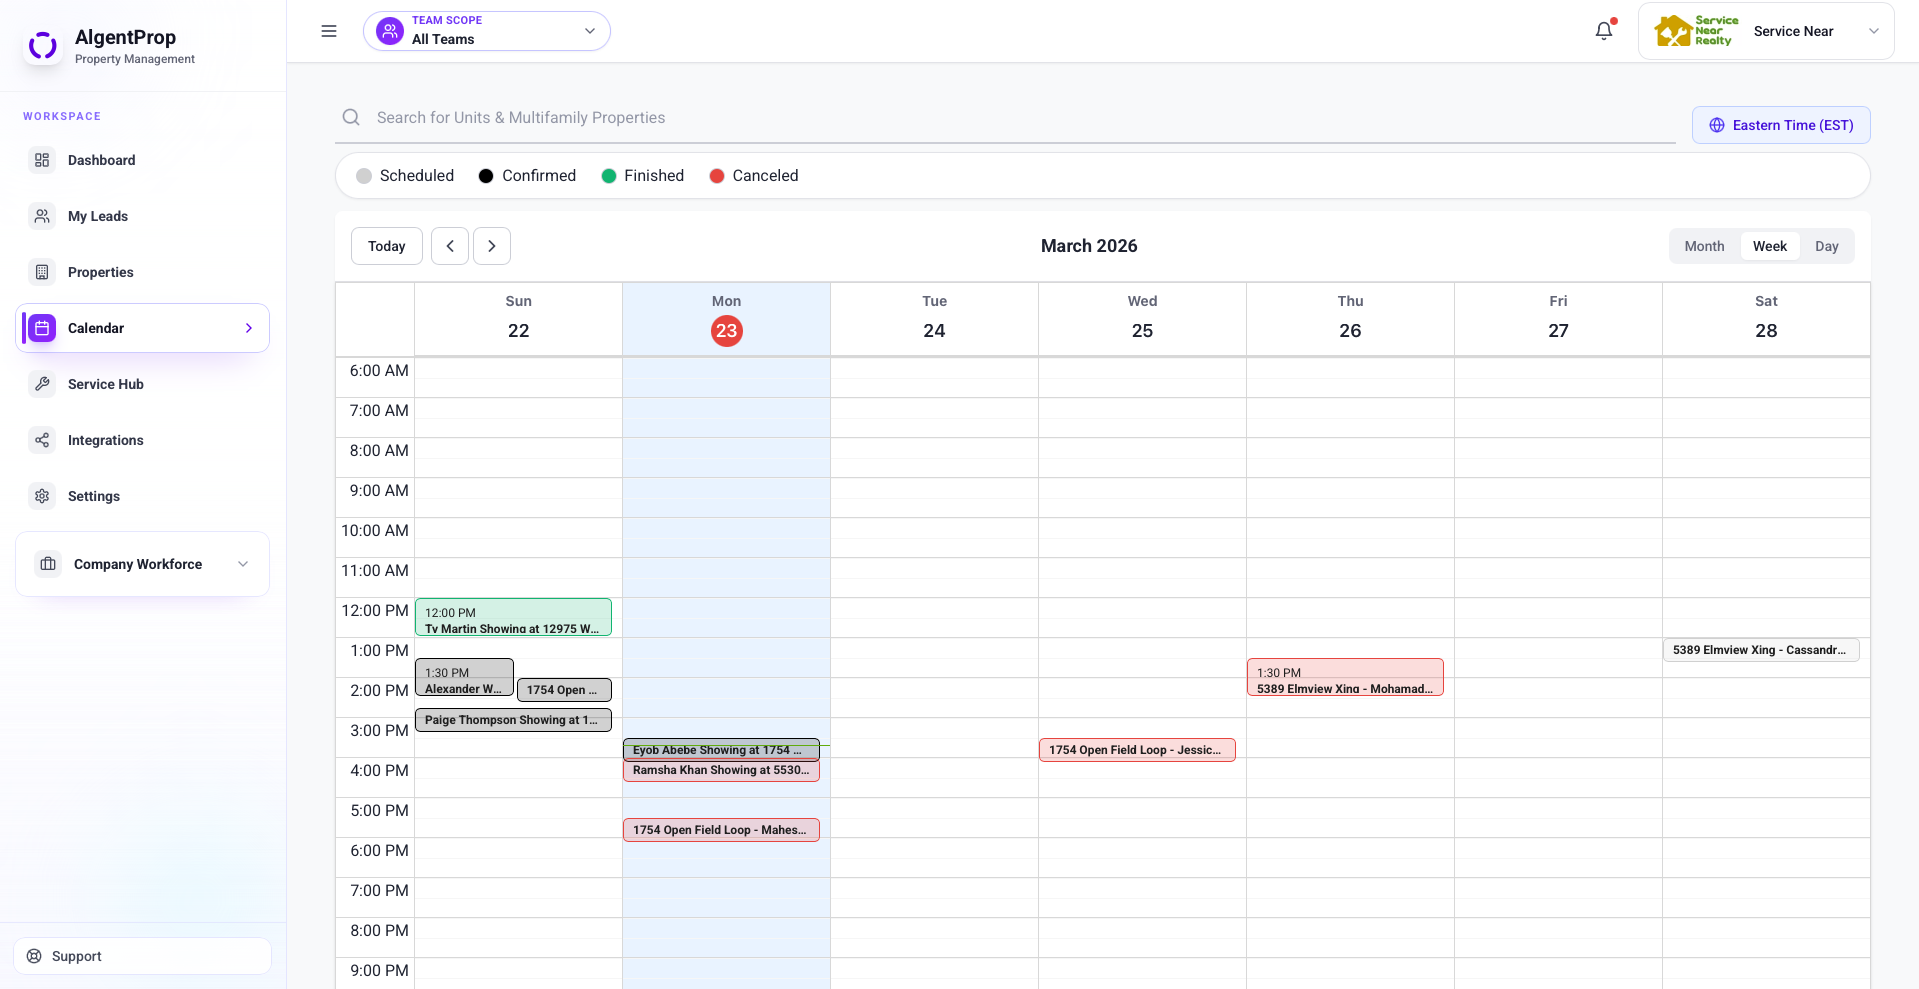
Showing Status Guide
Where To Operate
Manage Labor Force
Manage Labor Force
Use Company Workforce in the sidebar to manage both human and AI contributors.
This section contains Natural Contributors (human-powered services) and Neural Contributors (AI-powered services), and both are managed from this same workspace.
Natural Contributors (How To Add & Modify)
Neural Contributors (How To Modify)
Settings
Settings (How It Works)
/settingsOpen Settings to manage global behavior that affects operations across teams and properties.
General Settings — Includes application rules like Allow Applications Submit Before Prescreen and Allow Applications Submit Before Showing. If "Before Prescreen" is enabled, "Before Showing" is auto-enabled by design.
Portfolio Defaults — This is the most important baseline. Default values such as deposit policy, pet policy, utilities, move-in rules, move-in fees, and follow-up intervals are stored in user_settings.
When properties/units are imported (for example via PMS sync), these defaults are automatically applied as fallback values (e.g., cats/dogs policy, pet size, deposit percentage to security deposit, default showing availability) when source data is missing or when new records are created.
iFrame/Widget — Use this tab to generate embed code and URL for your public listing widget and chatbot widget, then paste into your company website to improve booking and application flow.
Default Showing Settings controls the platform-wide showing logic: Allow Prospect Showing Window Overlap, Minimum Scheduling Buffer, Showing Confirmation, Send Reminder Before Showing, Auto-Cancel Timeout, and Default Showing Window.
Numeric rules in Default Showing Settings: reminder send window is clamped to 1-24 hours, timeout is clamped to 1 to (send hours - 1), and minimum buffer is clamped to 0-72 hours.
Operationally: when showing confirmation is enabled, showings move through scheduled -> confirmation reminder -> confirmed/canceled logic. If disabled, showings can auto-confirm without confirmation reminder flow.
Q&A
Q&A
Common setup and operations questions from leasing teams.